
There is an unparalleled moment in the gunmaking process that takes place when, having sanded a raw walnut gunstock to a point of uniform consistency, often at 400 grit or so, the gunmaker applies the first sealing coat to the wood. With this first application of thinned oil, the heavens part: Even the most mundane piece of walnut takes on a level of beauty previously hidden, and the more-figured specimens become incandescent, revealing levels of warmth, contrast and depth that make a fine gunstock truly captivating. Despite this moment and the potency it brings to bear, that revelatory first coat of sealer is just one step in the finishing process. A great deal has to happen before and after to create that “hand-rubbed oil finish” that brings the best-quality gunstock to a mirror polish, simultaneously protecting the wood from the traumas of use. Here we will explore the process of building a best-quality oil finish on a fine gunstock, the variants of oil finishing products and processes, and how an oil finish may be differentiated from other types of common stock finishes.
The world of shotgun-stock finishes can be roughly divided in two. On one side live the high-gloss, polyurethane-based or catalyzed finishes regularly seen on Browning Citoris, some lower-end Berettas and generally all production guns of a certain price point and aesthetic. These finishes are thick, bright and hard; they are typically sprayed on in one or two coats; and they require two compounds to react with each other or some other chemical process to harden and set. The resulting finishes often look a bit synthetic and plasticky—Saran Wrap-esque, you might say—though they do have a certain utility: Because of speed and ease of application, they are relatively inexpensive to apply; they create a finish that is quite durable and, unless compromised, moisture resistant; and because of the thickness with which they can be applied, surface prep of the wood can be less than perfect. That said, when impacted, these finishes can chip, which not only proves unsightly but also exposes the underlying walnut to moisture, the presence of which results in a cloudy, oxidized or cracked appearance to the finished surface.
A fine, hand-rubbed oil finish, on the other hand, is not superficial but integral, and it therefore creates levels of beauty and protection—a lasting surface with some substance beneath it. The process to achieve this finish, however, is costly and time-consuming.
Author Del Whitman describes two primary types of hand-rubbed oil finishes: namely a hand-rubbed/sanded-in oil finish (his preference) and a traditional English slacum finish. Despite slightly different processes, both finishes produce a similar result and both necessitate an abundance of care in the preparation of the wood before any oil ever touches it. In Del’s method, no finish is applied until inletting has been completed and the exterior surface of the gun has been sanded fastidiously to a uniform surface, beginning at 80 grit and progressing to 400. The greatest consistency is achieved by “whiskering,” or lightly dampening the wood between grits to raise the grain, and then sanding the raised grain back to level. Once the 400-grit surface has been achieved and Del has ensured that the entire surface has been uniformly sanded, the sealing process (that magic moment referred to earlier) takes place.
Sealing is vitally important for two reasons: It allows the “hidden” portions of the gun (i.e., inletting, trigger-guard mortise, end grain at the butt and so on) to be sealed and protected from moisture penetration. It also ensures a uniform surface upon which to build the finish itself, meaning that the finish will go on evenly and consistently and not be absorbed into “thirsty” portions of the stock. A thoroughly sealed stock results in absolute consistency of the final finished product.
The sealer itself is generally just a thinned version of the final finish formulation reduced with a carrier like turpentine or mineral spirits that helps the sealer penetrate and allows it to dry quickly. In the case of a hand-rubbed/sanded-in oil finish, the finish itself is a fairly simple concoction (the sad reality being that the gunmaker’s alchemy does not necessitate a terribly esoteric ingredient list): a combination of very high-quality tung oil and/or linseed, Japan drier, turpentine and mineral spirits are the components, which are mixed appropriately for the desired outcome and thinned appropriately for each given stage of the process.
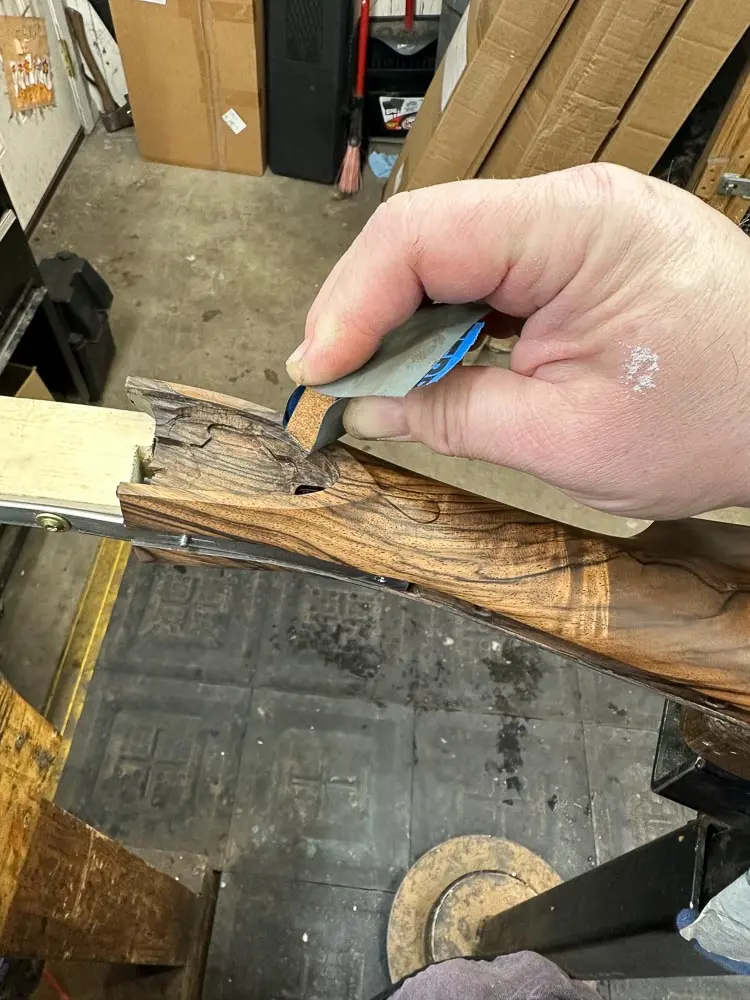
With the stock sanded to 400 grit, the sealer is applied with small acid brushes or a lint-free cloth. The wood is flooded with sealer, meaning that as much sealer as can be readily absorbed by the walnut is applied, and the wood is kept wet with sealer long enough to absorb all it can. Portions of stock blanks that are especially porous or highly figured often appear “thirsty,” meaning they absorb more sealer than the surrounding wood. Once the stock refuses to absorb any more sealer and the surface remains wet after flooding, the excess sealer is wiped away with a cloth and the stock is allowed to dry for a day or two before the process is repeated. This application of sealer may be repeated two, three, even four times, resulting in a sealer coat that has fully penetrated the wood and been allowed to become hard and dry. Any spot that has been overlooked and is therefore not fully sealed or any piece of the stock that remains capable of absorbing more sealer/finish will be a source of struggle for the remainder of the finishing process, for in that spot the finish will remain inconsistent. For that reason the sealing process must be thoroughly completed before the gunmaker moves on to the next finishing stage.
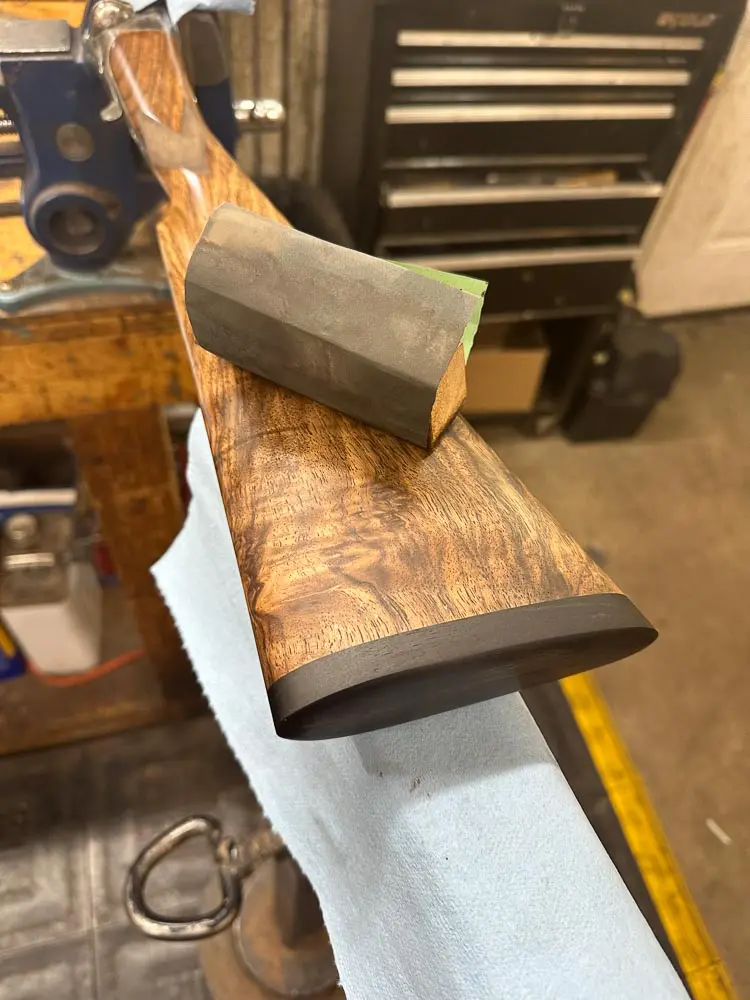
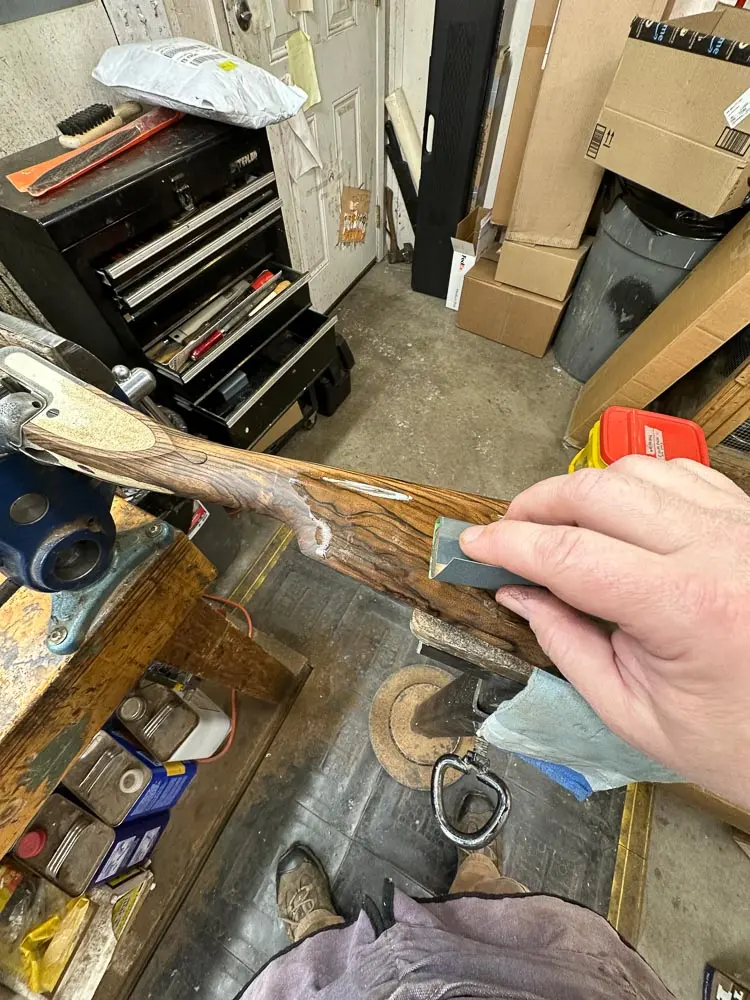
Once the stock is fully sealed, the next step in the hand-rubbed/sanded-in finish is to apply an un-thinned version of the finish formulation to the stock. The gunmaker applies the oil finish with a piece of quality silicon carbide sandpaper, literally “sanding” in the finish and in effect creating a mud, or slurry, that gets moved over the gunstock surface and forced into any pores in the stock. Breaking the stock into sections, finish is applied and sanded into each successive section beginning with 600-grit paper. Once the whole stock is sanded, any and all excess mud is wiped off and the stock is left to dry for a couple of days. The process is then repeated at 800 grit—maybe three or four times at this abrasive level with drying periods between. These successive sanding sessions at the same grit achieve the goal of filling all pores with that fine mud and in effect polishing the wood surface. The excess finish/mud must be entirely removed after each application, allowing the stock to take on a uniform luster. After several sessions at 800 grit, any checkering or fine inletting work can be completed.
After checkering, the sanding-in process is repeated at 1000 or even 1200 grit. The stock will now become increasingly shiny, almost looking finished at this stage—not so much because of any superficially applied finish but because of an increasingly fine polishing process and filling of the wood pores. After a final sand-in at this finest grit and the complete wipe-off of any residual finish/mud, the stock is thoroughly dried and the final stage in the process is at hand.
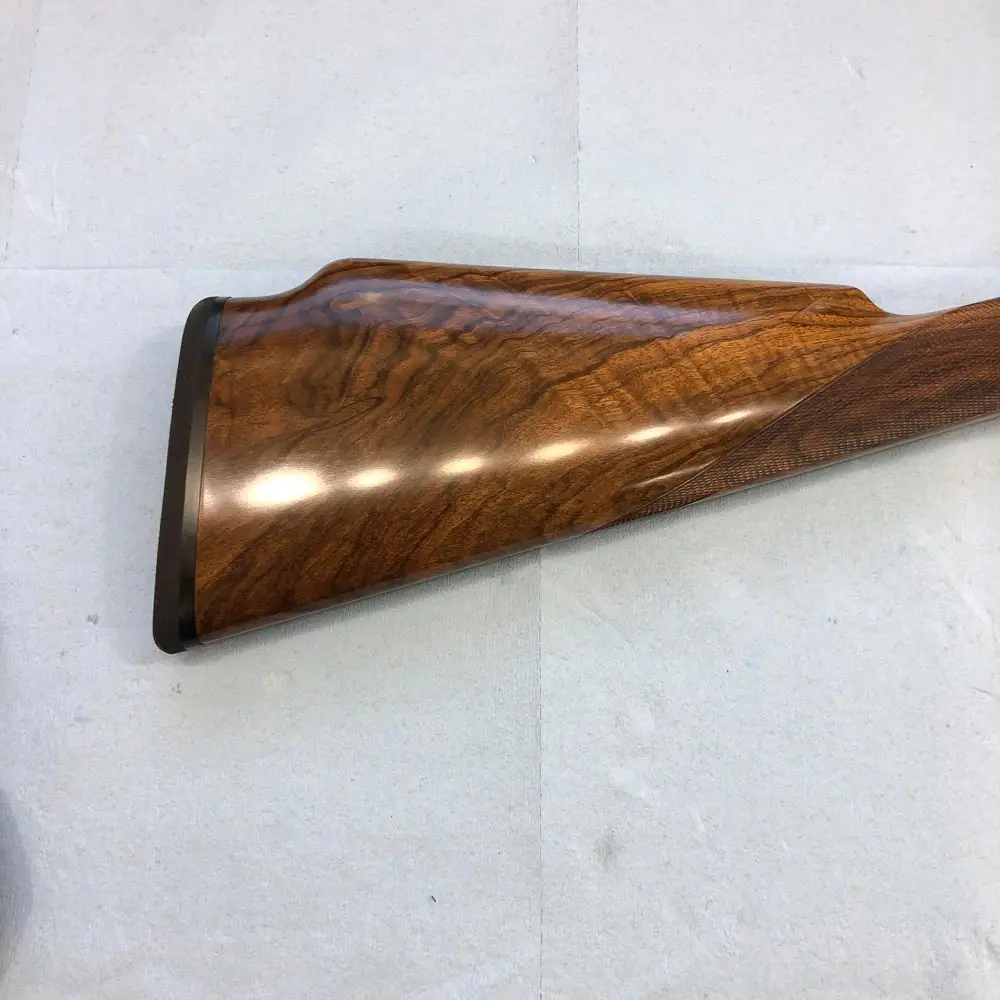
To finalize that high-gloss oil finish seen on British or Italian best guns, an incredibly thin topcoat of finish must be applied. To apply the topcoat, a tiny drop or two of the same finish as in previous stages (just thinned to 1/3) is applied to each side of the stock and rubbed in with Del’s bare hand. This micro-thin coat is then allowed to dry. After three successive applications as described, the dry topcoat is rubbed in or polishedwith a powder abrasive like rottenstone mixed with a small amount of thinned finish. Rottenstone is essentially a mineral abrasive that is as fine as flour that breaks down increasingly when used as a polishing agent, and the addition of finish serves to lubricate and create a polishing compound of sorts. This rottenstone compound is applied with a good cotton cloth or even a piece of hard felt, the latter of which helps in polishing detail areas like drop points. The topcoat is rubbed into the entire stock in sets of three thin coats and polished, and this process is repeated up to nine times. This repetitive process of adding a tiny bit of thin finish and rubbing it in with a powder abrasive is really little more than a laborious hand-polishing process that, when given time and attention, results in a high-gloss surface as non-porous as glass. This topcoating process will ensure that any figure or grain will be absolutely brilliant, showing in full glory by virtue of a finish not laid over it but built up from within.
The traditional British slacum finish, as stated earlier, achieves much the same result but through a slightly different process. Slacum, heralded as a hallmark of the British best-gun trade, came about before high-quality modern drying agents had been introduced, in turn making the sanding-in process possible. It employed the best ingredients available at the time, namely beeswax, linseed oil and Japan drier, combining these in a process that was both labor intensive and lengthy.
When applying a slacum finish, the gunmaker sands the raw gunstock to a slightly higher degree than in the other process, namely to 600 grit or so. Once uniformity of the raw wood has been achieved, a thinned formulation of high-quality boiled-linseed-oil finish (often tinted with alkanet root) is applied as sealer to the stock. Once fully sealed and tinted (alkanet is known to impart a ruddy, reddish pigment to the wood), a coat of whole finish is applied somewhat heavily and allowed to partially dry. Once the finish has become a bit tacky, or sticky, a bit more finish (which acts as a lubricant) and some rottenstone are applied over the top and rubbed onto the tacky finish with a fine cloth, again creating a sort of mud. This mud and the polishing motion of the abrasive slurry fill the pores with the tacky finish and polish the wood. Once fully polished, the excess mud is wiped away and the stock is allowed to dry. This process is repeated many, many times—often twice daily for a month or more—resulting in a super-polished surface in which all the pores have been filled. At this point very thin topcoats are applied to create that final sheen.
In either fashion of application, a proper hand-rubbed oil finish is a laborious process requiring a couple of months and many hours of handwork offset by drying time. The end result, however, is something that is hard to describe—something that communicates care and attention and a reverence for the wood itself. As evidenced above, a hand-rubbed oil finish is something that grows from within the wood, radiating beauty outward. To the hand it is smooth as glass, and to the eye it is uncannily lustrous, glowing more than shining. It is yet another example of the gunmaker’s art.
Buy This Issue!

Read our Newsletter
Stay connected to the best of wingshooting & fine guns with additional free content, special offers and promotions.


Hello
I have a silly question; When you say the finish is thinned to 1/3 does that mean add 1/3 mineral spirts to 2/3s finish or 2/3s mineral spirits to 1/3 finish?
Thank you