From our March/April 2025 issue
The first question I am usually asked regarding gunfitting is: “Do I really need a gunfit?” And the answer I usually give is: “Only if you want to shoot to your potential with a shotgun that shoots where you look.” Then once the gunfitting process is explained, the second question I often get is: “Why didn’t anyone tell me this before?”
Think about buying a suit or even a new car: The first thing you do is try it on or test-drive it. In the case of clothing, you can tell right away whether something fits and then have it altered; with a car, you can adjust the seats and mirrors until you are comfortable, can easily reach the controls and can see clearly. A shotgun that fits will improve your shooting experience in essentially the same way.
When you buy a shotgun, if you are about 5' 10" and 180 pounds, most guns will fit you out of the box. If you aren’t close to that height and weight, that’s when the variables begin.
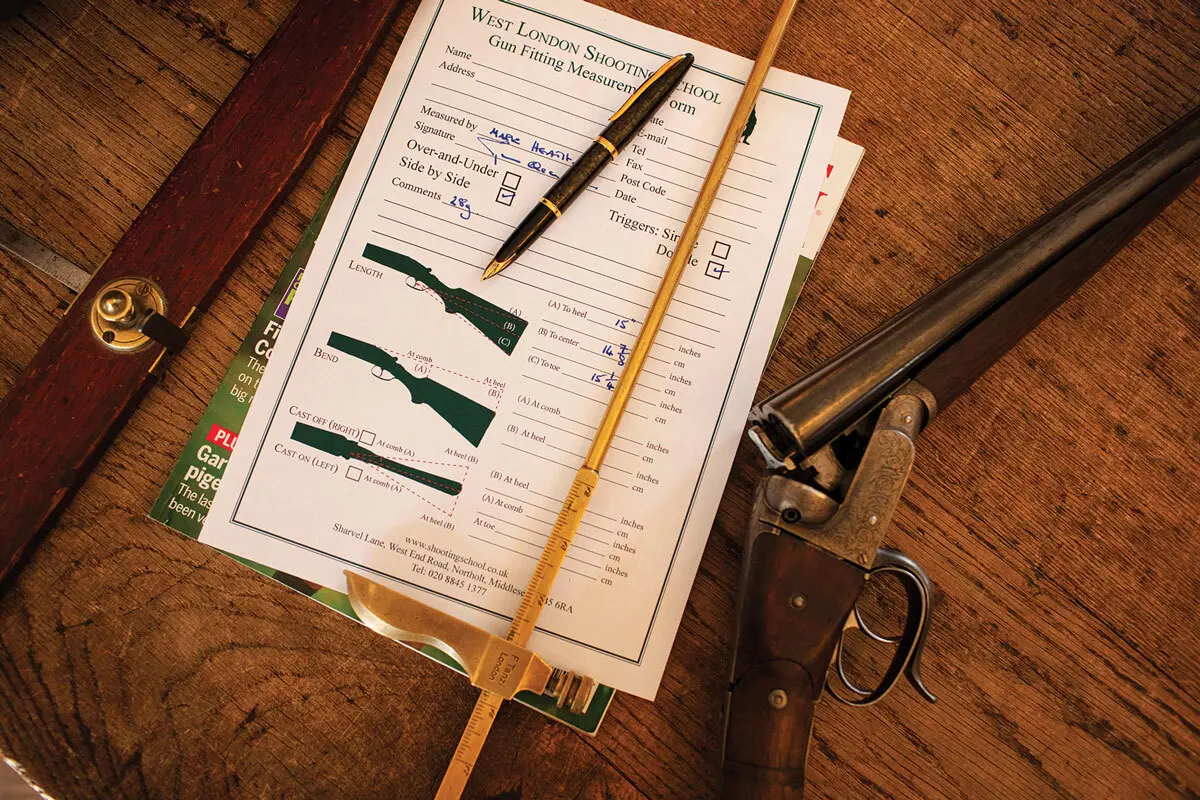
Once the try-gun has been adjusted and the shooter is consistently centering patterns on the pattern plate, the dimensions can be transferred to the fitting sheet.
If you are an experienced shot, you can tell if a shotgun fits or not as soon as you mount it. If you have to move your hands and turn your head on the stock to look straight down the rib, the gun needs to be adjusted to fit you. A gunfitting is the place to start.
A typical gunfitting takes anywhere from 1 1⁄2 to three hours, depending on how experienced the shooter is and how well he or she can mount a gun. If a person has a good, consistent gun mount, the entire session can go smoothly and quickly; but there have been times when I have had fittings that had to be preceded by shooting/gun-mounting lessons—and that’s when the process can take three hours or more.
Gunfittings can be done for both over/under and side-by-side shotguns. Because of the different stock configurations and depending on whether a side-by-side has a single trigger or double triggers, the dimensions and gunfitting process are not exactly the same. In other words, a fitting for an over/under using an O/U try-gun and the dimensions on an O/U fitting sheet cannot be directly applied to the fit of a side-by-side. Two separate fittings are required.
The gunfitting process begins with checking eye dominance. In so doing, I often have found that people have been closing one eye while shooting in order to compensate for their dominant eye being opposite the shoulder they shoot off of (e.g., a right-handed shooter who is left-eye dominant). A simple exercise of pointing a finger will help the gunfitter determine which is the dominant eye.
If a shooter is right-handed and right- eye dominant or left-handed and left- eye dominant, all is good. If a shooter is cross-dominant or has central vision, then a correction can be made by putting a “dot” (such as a ShotSpot) on the shooting-glasses lens opposite the shoulder being shot off of. This will result in the proper eye aligning with the mounted gun. Other solutions to cross-dominance include learning to shoot off the shoulder of the dominant eye or actually having a crossover stock made.
The next step is to mount the try-gun. A try-gun has a fully articulated stock that can be adjusted for length of pull, drop at face (comb height), cast and pitch. Initially it will be set up with standard dimensions for most shotguns, and then it will be adjusted as the shooter’s length of pull, comb height, cast and pitch are determined.
The important component of this step is that the shooter has a good gun mount. Often a gunfitting becomes a lesson on the fundamentals of stance, posture and head position—all of which are essential to a good gun mount. It is impossible to achieve a proper fitting
if the shooter cannot mount the gun to the same place in the face and shoulder every time. Many people have adapted to guns that don’t fit by rolling their heads and scrunching up their arms to get the guns into alignment. Once they no longer have to do this, the gunfitting process can move forward.
The length of pull is adjusted with the try-gun properly mounted. Length of pull is measured from the trigger (or the front trigger, if there are two) to the back of the stock at the heel, middle and toe. For the correct fit, when the gun is properly mounted, there should be about 11⁄4" and 13⁄4" between the trigger hand’s thumb and the front of the shooter’s nose. The shooter’s eye should be 2" to 3" from the comb and about 2⁄3 the distance from the end of the buttstock. The right length of pull will ensure that the shooter has a comfortable and consistent gun mount and grip.
Drop is one of the most critical measurements in a gunfitting, as it is the vertical angle of the stock and determines how the eye aligns with the top rib for the proper sight picture. Measured down from an imaginary extension of the rib to the stock’s comb, face and heel, the correct drop will have the dominant eye and rib lined up to shoot where the shooter wants the pattern to hit.
Cast is the bend of the stock to the right or left of center and is set to ensure that the shooter’s eye is aligned straight down the rib. The stock is bent to the right (“cast-off”) for right-handed shooters and to the left (“cast-on”) for left-handed shooters. Cast is measured at the face, heel and toe of the stock and measured against a straight edge extended from the rib down the length of the stock. Again, a good gun mount is critical in properly determining all of these measurements.
Finally, pitch is the angle of the butt of the stock in relation to the rib. A perfect right angle is zero pitch, and anything less than 90° is positive pitch. Pitch is important, as it can affect how high or low the gun shoots and how the butt fits into the shoulder pocket—which can, in turn, affect felt-recoil.
Once the try-gun is set up to the correct dimensions, the next step is to shoot a pattern plate. This is usually a steel plate about 4 feet square painted white with a black spot in the center. This step checks the point of impact of the pattern, the pellet distribution and the pattern’s position. By having the shooter fire at the plate from fixed distances, the gunfitter can see if any adjustments are necessary to achieve perfect alignment. If the shooter can consistently place patterns on the center spot with the try-gun, the gunfitter can then write the dimensions of the try-gun on the fitting sheet.
Once the shooter has the final gunfitting sheet, those dimensions can be used to either order a gun with a custom stock or modify the stock of a currently owned gun that doesn’t fit.
If a shooter brings his or her own guns to a fitting, the fitter can measure the guns, and the shooter can then give those measurements to a gunsmith to discuss altering the guns to the correct dimensions.
Finding a good gunfitter, like finding a good gunsmith, is a matter of doing research and consulting fellow shooters. Also, many gun dealers offer fittings with the purchase of a shotgun or can recommend gunfitters who they know are skilled and reliable.
The cost of a full custom gunfitting can vary from around $350 to more than $500. A gunfit “check,” which is simply measuring the shooter’s current gun and generally checking the fit, can run from $250 to $350.
Having a shotgun that fits is a great place to start on the quest to bettering one’s shooting. Then adding gun-mount drills and shooting practice will definitely have a bigger impact on improving skills and scores and ultimately putting more birds in your bag.

Never miss an issue. Subscribe to Shooting Sportsman magazine.
Read our Newsletter
Stay connected to the best of wingshooting & fine guns with additional free content, special offers and promotions.


