All of us have been impacted by the COVID-19 pandemic. It has affected many things we previously took for granted, and this winter and spring many of us may not have easy access to shooting grounds.
So what can one do to stay in shooting form? Following are six simple drills that can be practiced indoors with a minimal amount of equipment, so you can improve your shooting accuracy and consistency and be ready for that time when things get back to normal.
Foot Position & Balance Drill
Because the shotgun is turned by the core muscles associated with feet, legs, hips and shoulders, that is a good place to begin. With blue painter’s tape, mark a series of three target points on your wall at shoulder height about three feet apart. Stand with your feet shoulders’ width apart, with your belt buckle pointing to the break point of the target. Then take a quarter-turn to your right (or your left, if you shoot off your left shoulder).
Holding an eight-pound medicine ball between your outstretched hands, make smooth rotations from left to right and back, making sure the ball is turned with your legs, hips and torso, not your arms.
“Wax on, wax off,” as Mr. Miyagi said in The Karate Kid. Repeat with smooth, slow moves, as the brain retains muscle memory better with slow, smooth repetitions.
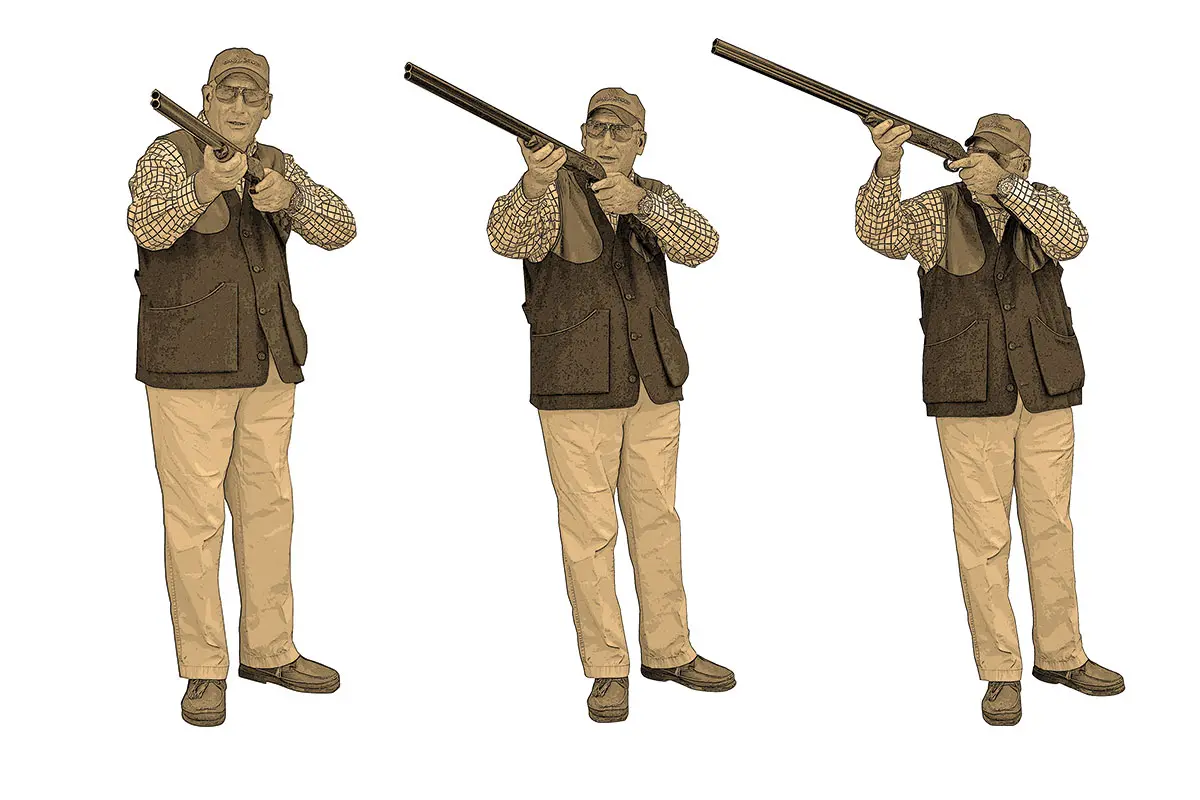
Gun-mount Drills with Mirrors
Be sure to practice any gun-mount drills with an empty gun. For clay shooting, use a mirror installed at head and shoulder height, so you can see your gun movement. Moving slowly and smoothly, complete your mount so the butt of the stock is correctly positioned in your shoulder pocket with the comb in direct contact with your cheek, just beneath your cheekbone.
If the drill is done right, your eye should be looking directly back at you. If your eye is not looking directly back, you may need to check your gunfit and make some alterations. Do not sacrifice a good gun mount trying to make an ill-fitting gun work. That will result in bad habits and “mystery misses.”
Upland hunters mount and shoot starting from the low-gun position. So begin the drill by standing a few yards back from a full-length mirror, and slowly mount the gun to your cheek and shoulder. Your forend hand should be lifting and pointing, and the comb and butt should arrive into your shoulder pocket and cheek at the same time. Again, if the drill is done correctly, your eye should be looking directly back at you.
Keep your head straight and avoid unnecessary head movement. Also make sure your feet are in the correct position. Look for faults like canting the stock or rolling or dropping your cheek to the comb.
Shooting Drill with Laser
Once you have mastered your gun mount using the mirror drills, the LaserShooter from Robert Louis Company is an excellent practice aid. It is available in 12, 20 and 28 gauge as well as .410, and it fits in the gun’s barrel. It also comes with a ring that is placed on the trigger finger that, when touched to the trigger, allows the user to simulate actual shooting. Another option is the Gotical Laser Bore Sighter, which is available in 12 and 20 gauge. The Bore Sighter is placed in the gun’s chamber and is used purely to practice swinging.
Using three pieces of blue masking (painter’s) tape two inches long, mark a line along the junction of the wall and the ceiling for the Visual Point, the Insertion Point and the Break Point of your target. The first piece of tape is the Visual Point (mark “VP” on the tape). The second piece, two feet from the first, is the Insertion Point (mark “IP” on the tape). The third piece of tape, two feet from the second, is the Break Point (mark “BP” on the tape).
From across the room, address your stance, posture and head position, and start with the heel of the stock butt touching the tendon that joins your bicep to your pectoral muscle. Then mount the gun, with your leading hand on the forend pointing to the first marker (the Visual Point), then continuing in a smooth move to the second marker (the Insertion Point) and finally to the third marker (the Break Point)—following through to complete the shot.
This exercise is used to practice crossing targets. For practicing driven targets, place the three pieces of tape on the ceiling using the same spacing between them. For quartering targets, place the three pieces of tape at a 45-degree angle on the wall.
And always follow the old gamekeeper’s adage: “Butt-belly-beak-bang.”
The Three-Cartridge Drill
On a shelf about six or eight feet off the floor, place a cartridge on the far left, in the center and on the far right approximately three feet apart, with the brass ends facing you. Place your laser device in your shotgun barrel and stand across the room 10 or more feet from the shelf. Adopt your stance and posture, and point (do not aim) at the center cartridge. Now, maintaining hard focus on the center cartridge, swing smoothly to the right cartridge, pause, realign on the center cartridge, and swing to the left cartridge. Repeat this exercise 10 times several times a day.
With practice, you can increase the distance between the cartridges as your peripheral perception improves.
Strength Drill with Bungee Cords
One of the most common mistakes made in mounting a gun is to seesaw the mount. One of the best ways to correct this is to place one end of a bungee cord on the hand holding the forend with the other end of the cord anchored under your leading foot.
Slowly mounting your gun under the tension created by the bungee cord not only builds strength but also ensures that the forend hand learns its job: pointing the barrels and maintaining their contact with the target. This move also helps cure the flinches that cause a seesaw gun mount and unwanted head movement.
High-Tech Aids to Drills
There are several excellent electronic “gizmos” that allow you to film and record your shots and instantly replay them on your smartphone or iPad in the field or on the shooting grounds.
ShotKam, AimCam and Garmin Xero S1 are the three well-known brands in shotgun-analysis cameras. The Arrow Laser Shot deserves a mention, as well, in that its laser cartridge can be used in combination with a target projector to train on a moving target.
Whichever device(s) you choose, all are effective and can be used in these indoor drills as well.
Finally, while some of these practice drills are as old as Methuselah, the basic practice of the fundamentals of stance, posture and gun mount is still the way to better shooting. If you really want to improve, there are no shortcuts. You need to practice until every move becomes a subconscious act of muscle memory. You can spot a really good shot from the way he or she mounts a gun, both hands working in tandem. It is a smooth, almost languid motion.
Even though cold winter days are upon us, you now have a good excuse to stay inside and practice for those sunny days of shooting that lie ahead. 
Chris Batha’s most recent book, The Instinctive Shot, can be ordered by visiting chrisbatha.com, which includes schedules of shoots and clinics with the author.
Read our Newsletter
Stay connected to the best of wingshooting & fine guns with additional free content, special offers and promotions.